5. Wood Finish Comparison Board
Objective
Visualize the effect of different finishes on various wood types.
Activity Steps
1. Get 3 small wood blocks (e.g., pine, oak, MDF).
2. Lightly sand each block to prepare the surface.
3. Apply a different finish to each block:
Stain
Clear Coat
Paint
4. Let each finish dry completely.
5. Label each block with the wood type and finish used.
6. Mount or arrange them on a comparison board
7. Take a photo.
Observations
Fill in the chart below after applying each finish to each wood type.

✅Project Checklist:
☐ 4–6 wood samples included
☐ Each piece is sanded and finished
☐ Wood types labeled clearly
☐ Neatly arranged on the board
☐ Finished project is clean and dry
☐ Show your project to parent or instructor and have them complete the rubric.
☐ Add rubric and photo to your binder.
Project Rubric: Wood Display Board
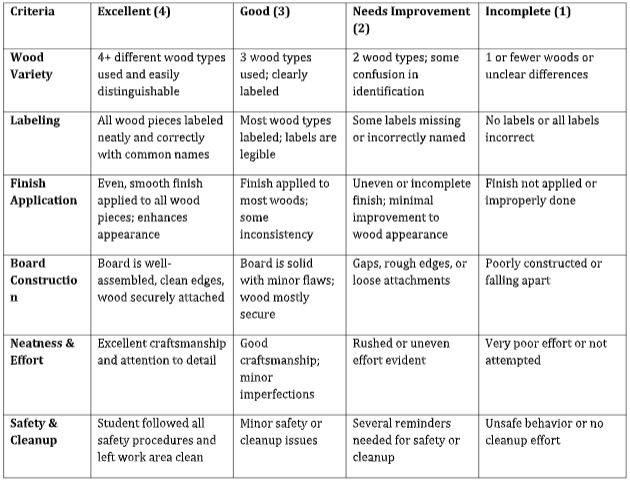
Total Score: ____ / 24